Organising a hike or a race: splitting the course for waymarking
A 25 km course to waymark, five volunteers, one Saturday morning. Here is how to prepare each person's section, the passing times and the documents for the day, from a single track.
Start from a clean track
Everything starts from the official track of the course. Import it (GPX, FIT, TCX or KML), or draw it with the Hiking profile. If it was recorded in the field, run it through Clean up first: GPS spikes and the clusters of points recorded during breaks inflate the distance you are going to announce. Then Correct elevation, for an ascent figure the runners won't dispute.
Then place markers where it matters: feed stations, marshal posts, junctions where people take a wrong turn. Right-click on the map → Drop a marker here. They go with every exported file and show up on most GPS devices.
Splitting replaces the track with its sections. Export the whole course to GPX first; if you make a mistake, ↶ Undo brings back the previous track.
Splitting the course into sections
- Select the trackA single track selected in the list.
- Open Split by interval🛠️ Edit menu → 📏 Split by interval.
- Choose the lengthDistance, for example 5 km. Each section becomes a separate track, in its own colour, named after the original track: "Course - 1", "Course - 2"…
- RenameThe ✏️ pencil in the track list: enter the waymarker's name, or the two places that bound the section.
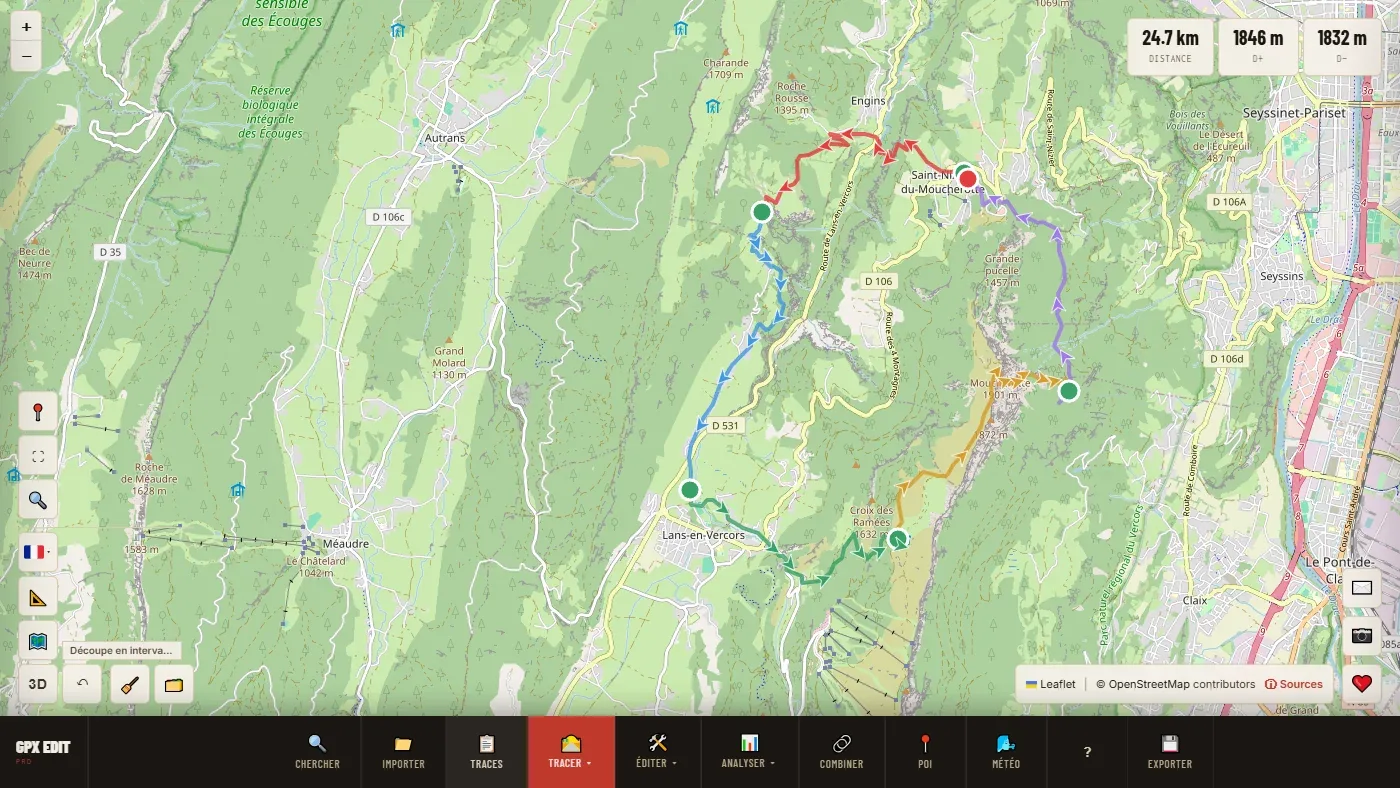
Sections of the same length don't mean the same amount of work: 5 km downhill on a forest road is not waymarked like 5 km of trail with 700 m of ascent. The track list gives the distance and the ascent of each section; if the difference is too large, split by hand instead, from one feed station or junction to the next, with ✂️ Cut here (right-click on the track).
Sending each waymarker their section
In 💾 Export, tick the sections and choose Separate files: one GPX file per section, to send by email or messaging app. The waymarker loads it onto their watch, their GPS or a hiking app on their phone. The markers go with each file.
For the whole team, 🔗 Share creates a link and a QR code to a public page of the course: everyone opens it in their browser, with no account. The link shares all the loaded tracks and the markers: to share only one section, open only that one.
The passing times
📊 Analyze → 🕑 Route card gives the passing time at each marker, or every 1, 2, 5 or 10 km, with breaks and the arrival time. It warns you if the arrival falls after sunset.
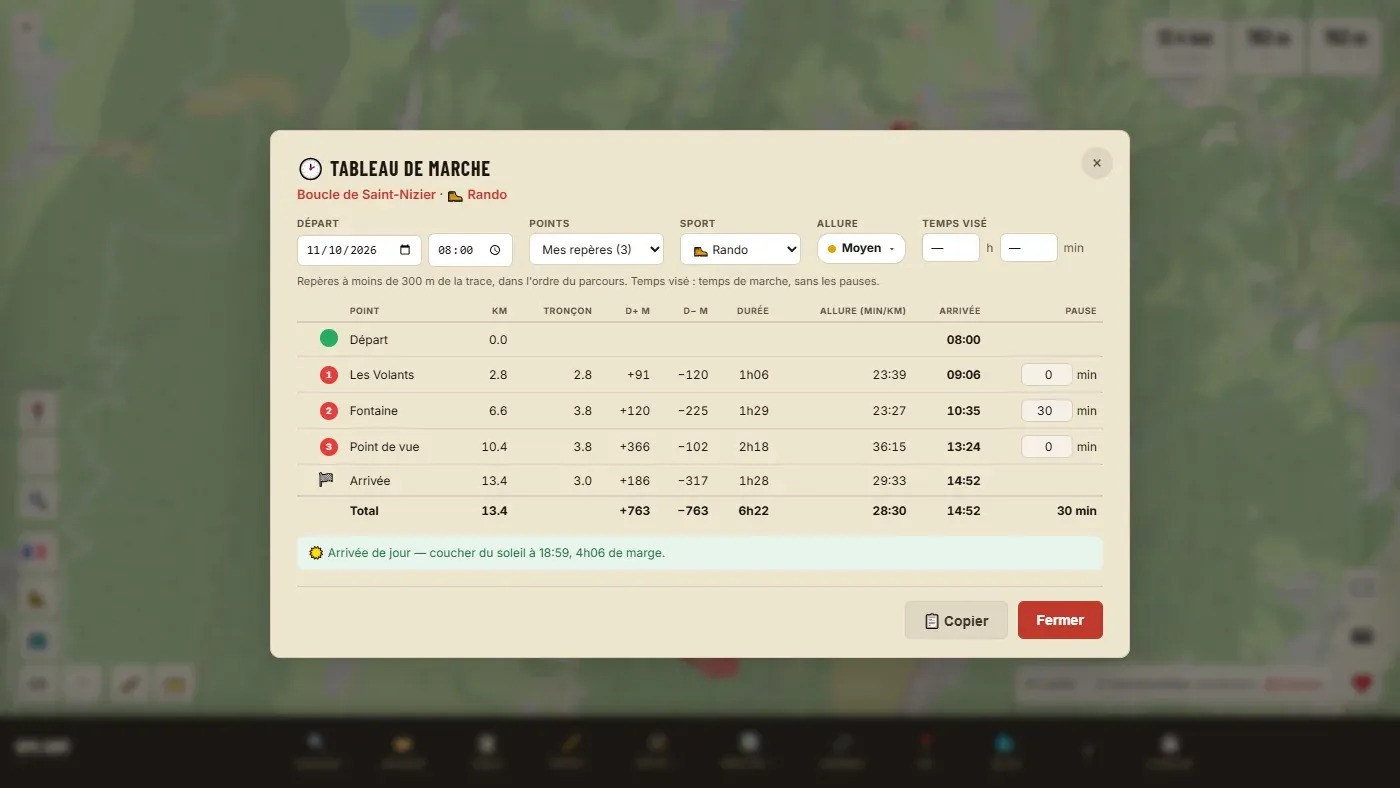
For a race, do it twice: at All-out pace for the leaders, at Relaxed pace for the back of the field. You get the opening and closing time of each post. The Target time field spreads a given time across the sections according to their terrain. 📋 Copy sends the table to a spreadsheet.
The documents for the day
💾 Export → 📄 PDF map produces one page per track: the map on a topographic background, the key figures, the profile, the markers, the country's emergency numbers, the route card and a QR code. Posted at the start or slipped into the marshals' folder, it answers half the questions of the day.
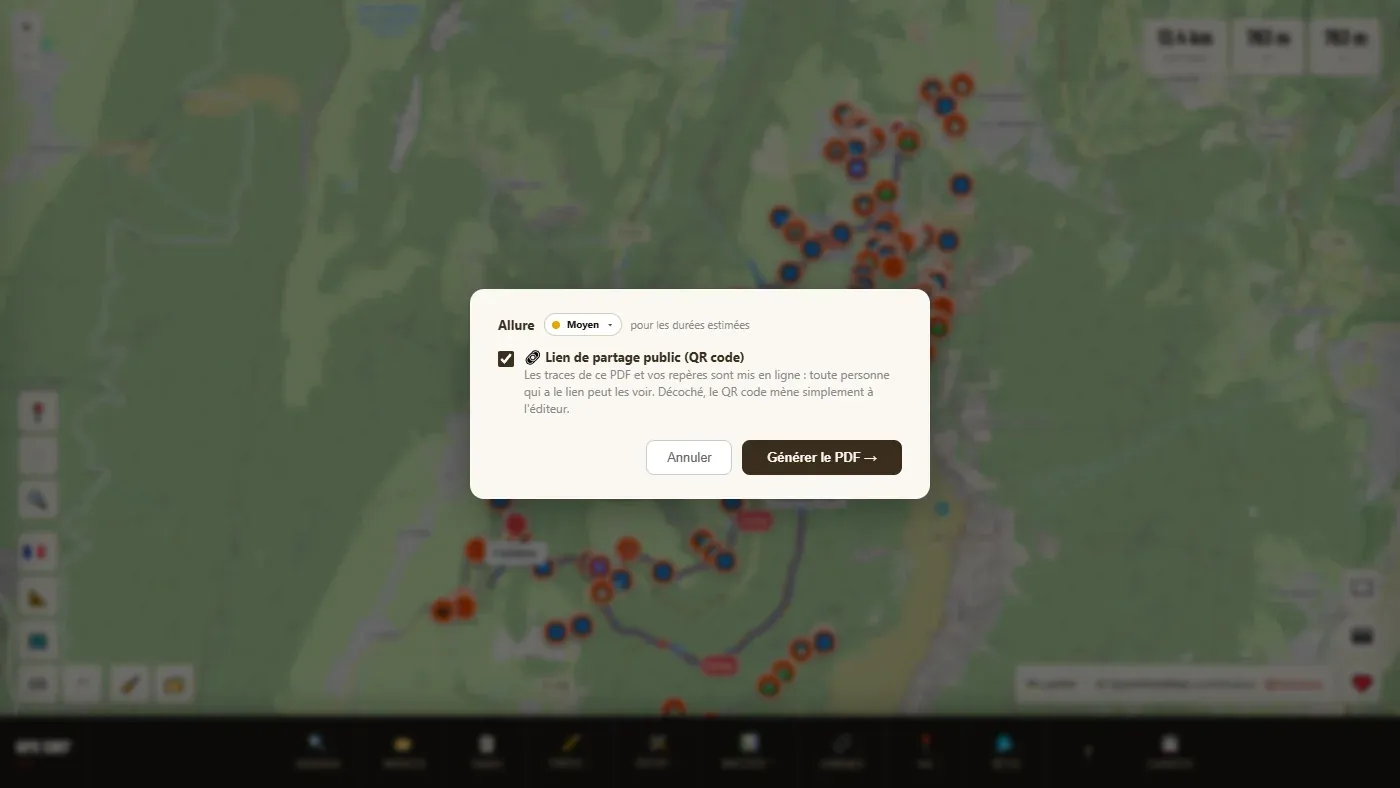
With the box ticked, the QR code puts the PDF's tracks and your markers online: anyone who scans it can see them. That's what you want for a race course; untick it for an internal document.
📖 Step by step in the manual: Split by interval · Markers · Route card · PDF map · Share
Prepare the waymarking of your event.
Open the editor for free →